DevOps for small / medium web apps - Part 1 - GitLab installation and configuration
Summary
- Introduction
- Cloud resources creation
- GitLab installation
- HTTPS configuration
- Mail server configuration
- Automatic backup configuration
- GitLab runner installation and configuration
- User management
- Maintenance
- Upgrade
Introduction
GitLab CE edition is a free open-source tool that will help us to host Git repositories and run our CI/CD pipeline.
In order to keep it simple, we will install GitLab on an ECS instance with a direct access to internet. Although the servers will be protected via encryption and restrictive security group rules, you might also want to isolate your virtual machines from internet by using a VPN Gateway.
The following diagram illustrates the architecture we will put in place for GitLab:

Cloud resources creation
The first step is to buy a domain name. This is necessary if you want to enable security on your servers:
- Sign in and open the Alibaba Cloud console;
- Go to the Domain console;
- Click on the “Purchase” button;
- Choose a domain, such as “my-sample-domain.xyz” and follow the instructions to buy it;
- Return to the Domain console and refresh the page in order to see your new domain;
Important: due to a limitation in Direct Mail, please choose a domain name with less than 28 characters.
The second step is to create ECS instances and related resources:
- Go to the VPC console (please click here for more information about VPCs);
- Select the region where you want to create the VPC on top of the page (for example “Singapore”);
- Click on “Create VPC”;
- Fill the new form with the following information:
- VPC name = devops-simple-app-vpc
- VPC destination CIDR Block = “192.168.0.0/16”
- VSwitch name = devops-simple-app-vswitch
- VSwitch zone = first zone of the list
- VSwitch destination CIDR Block = “192.168.0.0/24”
- Click on “OK” the create the VPC and the VSwitch;
- On the VPC list, click on the VPC you have just created;
- Scroll down and click on “0” at the right of “Security Group”;
- In the new page, click on “Create Security Group”;
- Fill the new form with the following information:
- Template = Web Server Linux
- Security Group Name = devops-simple-app-security-group
- Network Type = VPC
- VPC = select the VPC you just created (with the name devops-simple-app-vpc)
- Click on “OK” to create the security group and the rules from the template; note that the rules open the ports for SSH, HTTP, HTTPS and ICMP to any computer on internet;
- Go to the ECS console;
- Click on the “Create Instance” button;
- If needed, select “Advanced Purchase” (also named “Custom”);
- Fill the wizard with the following information:
- Billing Method = Pay-As-You-Go
- Region = the same as your VPC and the same availability zone as the VSwitch
- Instance Type = filter by vCPU = 2, Memory = 4 GiB, Current Generation tab, and select a remaining type such as “ecs.n4.large”
- Image = Ubuntu 18.04 64bit
- System Disk = Ultra Disk 40 GiB
- Network = VPC, select the VPC and VSwitch you have just created
- Do NOT assign a public IP (we will create an EIP instead, which is more flexible)
- Security Group = select the group you have just created
- Log on Credentials = select “Password” and choose one
- Instance Name = devops-simple-app-gitlab
- Host = devops-simple-app-gitlab
- Read and accept the terms of service
- Finish the instance creation by clicking on the “Create Instance” button;
- Go back to the ECS console, select the “Instances” item on the left menu and choose your region on top the screen; you should be able to see your new instance;
- Click on the “EIP” item on the left menu;
- On the new page, click on “Create EIP”;
- Fill the wizard with the following information:
- Region = the region where you have created your ECS
- Max Bandwidth = 1 Mbps
- Quantity = 1
- Click on “Buy Now”, select the agreement of service and click on “Activate”;
- Go back to the EIP console and check your new EIP;
- Next to you new EIP, click on “Bind”;
- In the new form, select:
- Instance Type = ECS Instance
- ECS Instance = devops-simple-app-gitlab/i-generatedstring
- Click on “OK” to bind the EIP to your ECS instance;
- Copy the IP Address of your EIP (it should be something like 47.88.155.70).
The ECS instance is ready for GitLab, let’s register a sub-domain for this machine:
- Go to the Domain console;
- On the row corresponding to your domain (for example “my-sample-domain.xyz”), click on “Resolve”;
- Click on “Add Record”;
- Fill the new form with the following information:
- Type = A- IPV4 address
- Host = gitlab
- ISP Line = Outside mainland China
- Value = The EIP IP Address (for example 47.88.155.70)
- TTL = 10 minute(s)
- Click on “OK” to add the record.
GitLab installation
We can now finally install GitLab! Open a terminal on your computer and type (note: if you use MAC OSX, you first need to disable the setting “Set locale environment variables on startup” in “Preferences > Profiles > Advanced”):
# Connect to the ECS instance
ssh root@gitlab.my-sample-domain.xyz # Use the password you set when you have created the ECS instance

# Update the machine
apt-get update
apt-get upgrade

# Add the GitLab repository for apt-get
cd /tmp
curl -LO https://packages.gitlab.com/install/repositories/gitlab/gitlab-ce/script.deb.sh
bash /tmp/script.deb.sh

# Install GitLab
apt-get install gitlab-ce

# Open GitLab configuration
nano /etc/gitlab/gitlab.rb
In the GitLab configuration file, replace the value of external_url by “http://gitlab.my-sample-domain.xyz” (the
domain you have just purchased and configured), then save and quit by pressing CTRL+X.
Now let’s start GitLab and try it. In your terminal, run the following command:
gitlab-ctl reconfigure
Open your web browser on “http://gitlab.my-sample-domain.xyz”. You should have a screen like this:
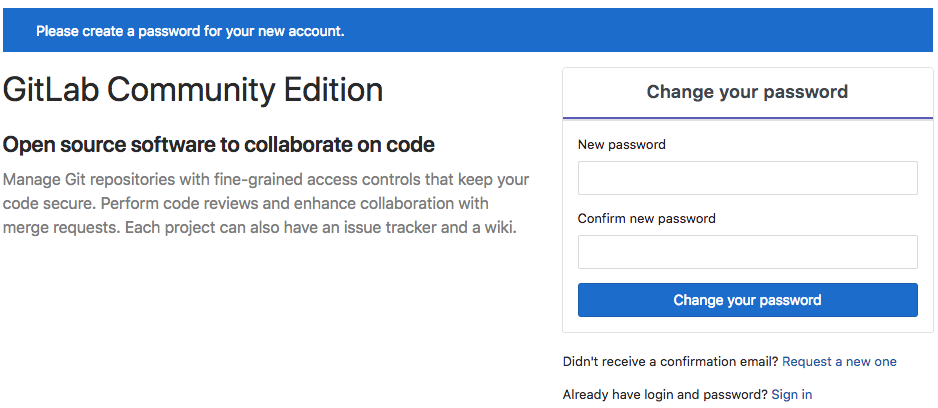
Congratulation if you get a similar screen! In case it doesn’t work, please first make sure you didn’t miss a step, then raise an issue if the problem persists.
Note: if you get automatically redirected to HTTPS, please continue to the next section first.
Do not enter your new password yet because you are using an unencrypted connection. Let’s fix this problem now.
HTTPS configuration
Open your terminal and enter the following commands:
# Connect to the ECS instance
ssh root@gitlab.my-sample-domain.xyz # Use the password you set when you have created the ECS instance

# Install dependencies
apt-get install ca-certificates openssh-server
apt-get install postfix # During the installation, select "Internet Site" and set your domain (e.g. gitlab.my-sample-domain.xyz)

# Open GitLab configuration
nano /etc/gitlab/gitlab.rb
The last command allows you to edit GitLab configuration:
- Modify the value of
external_urlby adding a ‘s’ to “http://” into “https://” (e.g. “https://gitlab.my-sample-domain.xyz”); - Scroll to “Let’s Encrypt integration” and insert the following lines:
letsencrypt['enable'] = true
letsencrypt['contact_emails'] = ["john.doe@your-company.com"] # Your email address
letsencrypt['auto_renew'] = true
letsencrypt['auto_renew_hour'] = 11
letsencrypt['auto_renew_minute'] = 42
letsencrypt['auto_renew_day_of_month'] = "*/14"
Quit and save the file by pressing CTRL+X, then apply the configuration change and restart GitLab with:
gitlab-ctl reconfigureCheck it worked by opening your web browser to https://gitlab.my-sample-domain.xyz (with the ‘s’ in https).
You can now enter your new password and sign in with the username “root” and your new password. You should be able to access to the GitLab dashboard.
Before going further we still need to configure two things:
- An email server so that GitLab can send emails.
- Automatic backup in order to avoid loosing data.
Mail server configuration
Note: Direct Mail is not available in all regions, but you can configure it in a different one from where you have created your ECS. At the time of writing, Direct Mail is available in China (Hangzhou), Singapore and Australia (Sydney). Please contact us if you need it in another region.
Go back to the Alibaba Cloud web console and execute the following instructions:
- Go to the Direct Mail console;
- Select the region on top of the page;
- Click on the “Email Domains” item on the left menu;
- Click on the “New Domain” button;
- In the new form, set the domain as “mail.my-sample-domain.xyz” (the domain you chose earlier with the prefix “mail.”);
- The page must be refreshed with your new email domain; click on the “Configure” link on its right side;
- The new page explains you how to configure your domain. Keep this web browser tab opened, open a new one and go to the Domain console;
- Click on the “Resolve” link next to your domain;
- Click on the “Add Record” button;
- Fill the new form with the following information:
- Type = TXT- Text
- Host = the “Host record” column under “1,Ownership verification” in the Direct Mail tab (e.g. aliyundm.mail)
- ISP Line = Outside mainland China
- Value = the “Record value” column under “1,Ownership verification” in the Direct Mail tab (e.g. 3cdb41a3351449c2af6f)
- TTL = 10 minute(s)
- Click “OK” and click again on the “Add Record” button;
- Fill the new form with the following information:
- Type = TXT- Text
- Host = the “Host record” column under “2,SPF verification” in the Direct Mail tab (e.g. mail)
- ISP Line = Outside mainland China
- Value = the “Record value” column under “2,SPF verification” in the Direct Mail tab (e.g. v=spf1 include:spfdm-ap-southeast-1.aliyun.com -all)
- TTL = 10 minute(s)
- Click “OK” and click again on the “Add Record” button;
- Fill the new form with the following information:
- Type = MX- Mail exchange
- Host = the “Host record” column under “3,MX Record Verification” in the Direct Mail tab (e.g. mail)
- ISP Line = Outside mainland China
- Value = the “Record value” column under “3,MX Record Verification” in the Direct Mail tab (e.g. mxdm-ap-southeast-1.aliyun.com)
- MX Priority = 10
- TTL = 10 minute(s)
- Synchronize the Default Line = checked
- Click “OK” and click again on the “Add Record” button;
- Fill the new form with the following information:
- Type = CNAME- Canonical name
- Host = the “Host record” column under “4,CNAME Record Verification” in the Direct Mail tab (e.g. dmtrace.mail)
- ISP Line = Outside mainland China
- Value = the “Record value” column under “4,CNAME Record Verification” in the Direct Mail tab (e.g. tracedm-ap-southeast-1.aliyuncs.com)
- TTL = 10 minute(s)
- Click “OK”;
You should probably have a domain configuration that looks like that:
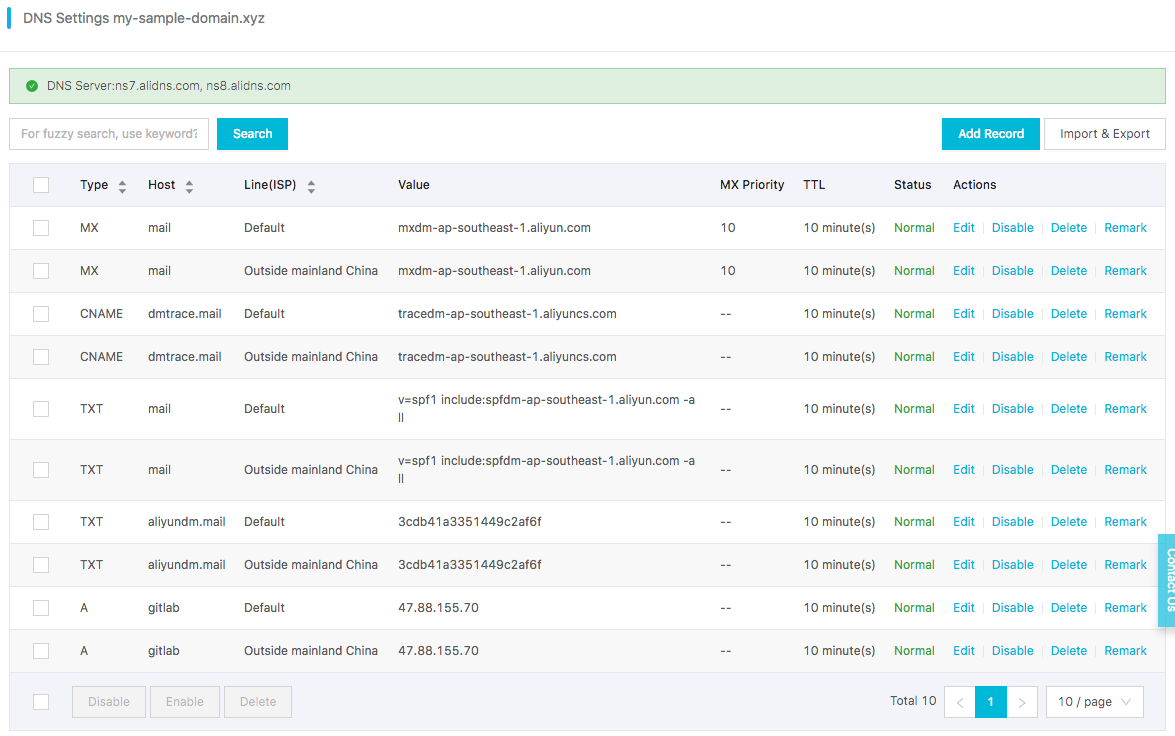
Continue the email server configuration:
- Go back to the Direct Mail console (the web browser tab you kept opened);
- Click on the “Cancel” button to go back to the email domain list;
- Click on the “Verify” link next to your new domain, and confirm when the prompt appears;
- Refresh the page after 20 sec. If the status of your domain is still “To Be Verified”, click on the “Configure” link and check which step is still in the “To Be Verified” status, fix your domain configuration and re-do the previous step (“Verify” link). Sometime the verification step is a bit slow and you need to retry several times. When the email domain status is “Verification successful”, you can continue to the next step;
- Click on the “Sender Addresses” item on the left menu;
- Click on the “Create Sender Address” button;
- Fill the new form with the following information:
- Email Domains = mail.my-sample-domain.xyz (the email domain you just configured)
- Account = gitlab
- Reply-To Address = your email address (e.g. john.doe@your-company.com)
- Mail Type = Triggered Emails
- Click on “OK” to close the form;
- Your new sender address should be added to the list; click on the “Set SMTP password” link next to it;
- Set the SMTP password and click on “OK”;
- Click on the “Verify the reply-to address” link next to your new sender address, and confirm when the prompt appears;
- Check your mailbox corresponding to the address you set in the “Reply-To Address” field, you should have received an email from “directmail”;
- Click on the link in this email in order to see a confirmation message;
- Go back to the sender addresses page and save the SMTP address and port at the end of the description, it should be something like “SMTP service address: smtpdm-ap-southeast-1.aliyun.com . SMTP service ports: 25, 80 or 465(SSL encryption).”
Now that the email server is ready, let’s configure GitLab to use it. Open a terminal on your computer and enter the following commands:
# Connect to the ECS instance
ssh root@gitlab.my-sample-domain.xyz # Use the password you set when you have created the ECS instance

# Open GitLab configuration
nano /etc/gitlab/gitlab.rb
Scroll down to “### Email Settings” and insert the following lines:
gitlab_rails['gitlab_email_enabled'] = true
gitlab_rails['gitlab_email_from'] = 'gitlab@mail.my-sample-domain.xyz' # The sender address you have just created
gitlab_rails['gitlab_email_display_name'] = 'GitLab'
gitlab_rails['gitlab_email_reply_to'] = 'gitlab@mail.my-sample-domain.xyz'
Scroll down to “### GitLab email server settings” and insert the following lines:
gitlab_rails['smtp_enable'] = true
gitlab_rails['smtp_address'] = "smtpdm-ap-southeast-1.aliyun.com"   # SMTP address written in the Direct Mail console
gitlab_rails['smtp_port'] = 465                                     # SMTP port written in the Direct Mail console
gitlab_rails['smtp_user_name'] = "gitlab@mail.my-sample-domain.xyz" # Sender address
gitlab_rails['smtp_password'] = "HangzhouMail2018"                  # SMTP password for the sender address
gitlab_rails['smtp_domain'] = "mail.my-sample-domain.xyz"           # Your email domain
gitlab_rails['smtp_authentication'] = "login"
gitlab_rails['smtp_enable_starttls_auto'] = false
gitlab_rails['smtp_tls'] = true
Apply the configuration change and restart GitLab:
gitlab-ctl reconfigure
You can test the configuration like this:
- Go to GitLab and sign in as root: https://gitlab.my-sample-domain.xyz/
- Click on the “Admin area” button in the top menu (the wrench icon);
- Click on the “Users” item in the left menu;
- Click on the “Administrator” user;
- Click on the “Edit” button;
- Change the “Email” field to your personal email address;
- Click on “Save changes”;
- Sign out by clicking on your profile picture on the top-right of the page and by selecting “Sign out”;
- Click on the “Forgot your password?” link;
- Set your personal email address and click on “Reset password”;
- Check in your personal mailbox and verify you have received an email (it may be in the spam folder).
Automatic backup configuration
Backups are important because they prevent data loss in case of accident and allow you to migrate to another ECS instance if you need.
In order to run backups automatically, please open a terminal and run the following commands:
# Make sure rsync is installed
apt-get install rsync

# Install the latest version of tar
cd /tmp
wget http://ftp.gnu.org/gnu/tar/tar-latest.tar.gz
tar -xvzf tar-latest.tar.gz
cd tar-*/
FORCE_UNSAFE_CONFIGURE=1 ./configure
make
make install

# Restart the machine to make sure all users use the same version of tar
reboot

# Re-connect after few seconds to the ECS instance
ssh root@gitlab.my-sample-domain.xyz # Use the password you set when you have created the ECS instance

# Check the tar version is >= 1.30
tar --version

# Install OSSFS, a tool that allow us to mount an OSS bucket as a local folder: https://github.com/aliyun/ossfs
apt-get install gdebi-core
cd /tmp
wget https://github.com/aliyun/ossfs/releases/download/v1.80.5/ossfs_1.80.5_ubuntu16.04_amd64.deb
gdebi ossfs_1.80.5_ubuntu16.04_amd64.deb
Note: the GitLab documentation requires tar version to be equals to or greater than 1.30.
Let’s now create an OSS bucket where we will store our backups:
- Go to the OSS console;
- Click on the “Create Bucket” button;
- Fill the new form with the following information:
- Bucket Name = gitlab-my-sample-domain-xyz (you can set the name you want, but it must be unique)
- Region = the same as your ECS instance (e.g. Asia Pacific SE 1 (Singapore))
- Storage Class = Standard
- Access Control List (ACL) = Private
- Click on the “OK” button;
- The page must show the bucket you have just created. Please save the last “Endpoint” for VPC Network Access (something like “oss-ap-southeast-1-internal.aliyuncs.com”), it contains your bucket name and the region id (e.g. ap-southeast-1).
You will also need an access key id and secret:
- Go to the User console by clicking on your user on the top-right of the page and by selecting AccessKey;
- Click on the “Create Access Key” button;
- Note the AccessKeyID and the AccessKeySecret and click on “Save AccessKey Information”.
In your terminal, mount your OSS bucket as a folder:
# Save your bucket name, access key id and access key secret in the file /etc/passwd-ossfs
# The format is my-bucket:my-access-key-id:my-access-key-secret
echo gitlab-my-sample-domain-xyz:LTAIsP66uJ8zujwZ:rc15yggaCX08AiYKe2BGnX49wNUGpk > /etc/passwd-ossfs
chmod 640 /etc/passwd-ossfs

# Create a folder where we will mount the OSS bucket
mkdir /mnt/gitlab-bucket

# Mount the OSS bucket
# The -ourl come from the last "Endpoint" for VPC Network Access
ossfs gitlab-my-sample-domain-xyz /mnt/gitlab-bucket -ourl=http://oss-ap-southeast-1-internal.aliyuncs.com

# Check it works
echo "It works" > /mnt/gitlab-bucket/test.txt

# Unmount the OSS bucket
umount /mnt/gitlab-bucket
Check that the test file is present in your bucket:
- Go to the OSS console;
- Click on your bucket name on the left menu;
- Click on “Files” on the top menu;
- The file “test.txt” should be present and should contain “It works”;
- Delete this file.
Configure the OSS bucket so that it is automatically mounted when the ECS machine starts. Create the following file:
nano /etc/systemd/user/ossfs.service
Adapt and copy the following content:
[Unit]
Description=OSSFS mounts
Wants=network-online.target
After=network-online.target

[Service]
Type=oneshot
RemainAfterExit=yes
ExecStart=/usr/local/bin/ossfs gitlab-my-sample-domain-xyz /mnt/gitlab-bucket -o allow_other -ourl=http://oss-ap-southeast-1-internal.aliyuncs.com
ExecStop=/bin/umount /mnt/gitlab-bucket

[Install]
WantedBy=default.target
Make sure you set the right bucket name and endpoint. Quit and save by pressing CTRL+X. Configure Systemd to run this script at startup:
systemctl --user enable ossfs.service

# Restart the machine to test
reboot

# Re-connect after few seconds to the ECS instance
ssh root@gitlab.my-sample-domain.xyz # Use the password you set when you have created the ECS instance

# Create a sample file
echo "Second test" > /mnt/gitlab-bucket/test2.txt
Go to the OSS console, check that the test2.txt file is present in your bucket and delete it.
Let’s now configure GitLab to put its backup files in the mounted folder. Open the terminal and run:
# Open GitLab configuration
nano /etc/gitlab/gitlab.rb
Scroll to “### Backup Settings” and insert the following line:
gitlab_rails['backup_path'] = "/mnt/gitlab-bucket/backup/"
Quit and save by pressing CTRL+X, then check if it works:
# Apply GitLab configuration
gitlab-ctl reconfigure

# Manually launch a first backup
gitlab-rake gitlab:backup:create
The last command should have created a backup. Go to the OSS console and check you have a file with a path like “backup/1540288854_2018_10_23_11.3.6_gitlab_backup.tar”.
Let’s now configure automatic backup to be executed automatically every night. For that we will create two types of cron jobs: one to execute the backup command above, one to save the GitLab configuration files.
Open your terminal and execute:
# Edit the CRON configuration file. Select nano as the editor.
crontab -e
Enter the following lines into this file:
0 2 * * * /opt/gitlab/bin/gitlab-rake gitlab:backup:create CRON=1
0 2 * * * /bin/cp /etc/gitlab/gitlab.rb "/mnt/gitlab-bucket/backup/$(/bin/date '+\%s_\%Y_\%m_\%d')_gitlab.rb"
0 2 * * * /bin/cp /etc/gitlab/gitlab-secrets.json "/mnt/gitlab-bucket/backup/$(/bin/date '+\%s_\%Y_\%m_\%d')_gitlab-secrets.json"
Save and quit by pressing CTRL+X.
You now have configured automatic backup every night at 2AM. If you want to test this configuration you can replace “0 2 * * *” by the current time + 2 min; for example if the current time is 14:24, then set “26 14 * * *”; after that you need to wait about 2 min and check whether new files have been created in your OSS bucket.
The restoration process is well described in the official documentation (section “Restore for Omnibus installations”). Note that it is considered as a good practice to test your backups from time to time.
GitLab runner installation and configuration
It is a good practice to run CI/CD jobs (code compilation, unit tests execution, application packing, …) on a different machine from the one that run GitLab.
Thus, we need to setup one runner on a new ECS instance. Please execute the following instructions:
- Go to the VPC console;
- Select the region of the GitLab ECS instance (on top of the screen);
- Click on the VPC “devops-simple-app-vpc”;
- Click on “1” next to “Security Group”;
- Click on “Create Security Group”;
- Fill the new form with the following information:
- Template = Customize
- Security Group Name = devops-simple-app-security-group-runner
- Network Type = VPC
- VPC = select the VPC “devops-simple-app-vpc”
- Click on “OK” to create the group; We will not add any rule in order to be as restrictive as possible (to improve security);
- Go to the ECS console;
- Click on the “Create Instance” button;
- If needed, select “Advanced Purchase” (also named “Custom”);
- Fill the wizard with the following information:
- Billing Method = Pay-As-You-Go
- Region = the same as the ECS instance where you have installed GitLab
- Instance Type = filter by vCPU = 2, Memory = 4 GiB, Current Generation tab, and select a remaining type such as “ecs.n4.large”
- Image = Ubuntu 18.04 64bit
- System Disk = Ultra Disk 40 GiB
- Network = VPC, select the VPC and VSwitch of the GitLab ECS instance
- Assign a public IP (no need of an EIP this time)
- Security Group = select “devops-simple-app-security-group-runner”
- Log on Credentials = select “Password” and choose one
- Instance Name = devops-simple-app-gitlab-runner
- Host = devops-simple-app-gitlab-runner
- Read and accept the terms of service
- Finish the instance creation by clicking on the “Create Instance” button;
- Go back to the ECS console, select the “Instances” item on the left menu and choose your region on top the screen; you should be able to see your new instance “devops-simple-app-gitlab-runner”;
- Click on the “Connect” link on the right of your ECS instance, copy the VNC Password (something like “667078”) and enter it immediately after;
- You should see a terminal in your web browser inviting you to login. Authenticate as root with the password you have just created;
Execute the following commands in this “web-terminal”:
# Update the machine
apt-get update
apt-get upgrade

# Add a new repository for apt-get for GitLab Runner
curl -L https://packages.gitlab.com/install/repositories/runner/gitlab-runner/script.deb.sh | sudo bash

# Add a new repository for apt-get for Docker
apt-get install software-properties-common
curl -fsSL https://download.docker.com/linux/ubuntu/gpg | sudo apt-key add -
add-apt-repository \
   "deb [arch=amd64] https://download.docker.com/linux/ubuntu \
   $(lsb_release -cs) \
   stable"

# Update the machine
apt-get update

# Install GitLab runner
apt-get install gitlab-runner

# Install dependencies for Docker
apt-get install apt-transport-https ca-certificates curl software-properties-common

# Install Docker
apt-get install docker-ce
As you can see we setup two applications: GitLab Runner and Docker. We will keep things very simple with Docker: it is a very powerful tool, but for the moment we will just use it as a “super installer”, for example we will not setup any tool, compiler or SDK on this machine; instead we will be lazy and let Docker to download the right images for us. Things will become more clear later in this tutorial when we will configure our CI/CD pipeline.
Now we need to connect the runner with GitLab:
- Open GitLab in another web browser tab (the URL must be like https://gitlab.my-sample-domain.xyz/);
- Sign in if necessary;
- Click on the “Admin area” button in the top menu (the wrench icon);
- Click on the “Runners” item in the left menu;
The bottom of the page contains an URL and a token:

Go back to the “web-terminal” connected to the runner machine, and type:
gitlab-runner register
This tool needs several information in order to register the runner. Enter the following responses:
- Please enter the gitlab-ci coordinator URL (e.g. https://gitlab.com): copy the URL from the GitLab page above (e.g. https://gitlab.my-sample-domain.xyz/)
- Please enter the gitlab-ci token for this runner: copy the token from the GitLab page above (e.g. gXppo8ZyDgqdFb1vPG-w)
- Please enter the gitlab-ci description for this runner: devops-simple-app-gitlab-runner
- Please enter the gitlab-ci tags for this runner (comma separated): (keep it empty)
- Please enter the executor: docker
- Please enter the default Docker image (e.g. ruby:2.1): alpine:latest
After the tool gives you back the hand, you should be able to see this runner in the GitLab web browser tab. Refresh the
page and check at the bottom, you should see something like this:
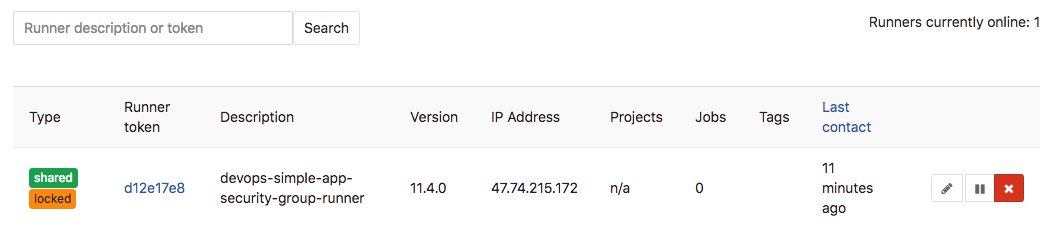
Our GitLab is now ready to be used! But there are few more points to consider before creating our first project:
User management
As administrator, there are few steps you need to follow in order to improve your GitLab account:
- Open GitLab in your web browser (the URL must be like https://gitlab.my-sample-domain.xyz/);
- Click on your avatar on the top-right of the page and select “Settings”;
- Correctly set the “Full name” and “Email” fields and click on the “Update profile settings” button;
- Click on the “Account” item on the left menu;
- Change your username and click on the “Update username” button, then confirm it again when the prompt appears (this step improves security as attackers would have to guess your username in addition to your password).
You may also want to control who can register on your GitLab server (the default configuration allows anyone on internet to register):
- Click on the “Admin area” button in the top menu (the wrench icon);
- Click on the “Settings” item in the left menu;
- Expand the “Sign-up restrictions” section;
- Uncheck the “Sign-up enabled” field;
- Click on the “Save changes” button.
Now only administrators can create new users. This can be done by navigating to the “Overview > Users” menu in the “Admin area”.
Maintenance
Linux servers need to be upgraded from time to time: security patches must be installed as soon as possible and applications should be updated to their latest versions.
On Ubuntu instances, the following commands allow you to safely update your server:
apt-get update
apt-get upgrade
Other commands such as apt-get dist-upgrade or do-release-upgrade are less safe, especially
the last one since it can update Ubuntu to a newer LTS version that is not yet supported by Alibaba Cloud.
For more complex upgrade it may be more practical to replace the ECS instance:
- Create a backup of the existing GitLab data;
- Create a new ECS instance and install GitLab (note: the GitLab version on the new ECS instance must be the same as the old one, if not the backup-restore process will fail);
- Restore the backups into the new machine;
- Check the new instance works;
- Unbind the EIP from the old ECS instance and bind it to the new one;
- Release the old ECS instance.
Security updates can be automatically installed thanks to unattended-upgrades. For each ECS instance (GitLab and
its runner), open a terminal (via SSH or via the web-terminal console) and enter the following commands:
# Install unattended-upgrades
apt-get install unattended-upgrades

# Check the default configuration is fine for you. Press CTRL+X to quit.
nano /etc/apt/apt.conf.d/50unattended-upgrades

# Enable automatic upgrades
dpkg-reconfigure --priority=low unattended-upgrades

# Edit the related configuration
nano /etc/apt/apt.conf.d/20auto-upgrades
The last configuration file can be modified in order to look like this:
APT::Periodic::Update-Package-Lists "1";
APT::Periodic::Unattended-Upgrade "1";
APT::Periodic::Download-Upgradeable-Packages "1";
APT::Periodic::AutocleanInterval "7";
Save and quit by pressing CTRL+X. You can launch unattended-upgrades manually for testing:
unattended-upgrade -d
The logs of unattended-upgrades are printed in /var/log/unattended-upgrades.
More information about automatic update can be found here.
Upgrade
The described architecture for GitLab is fine as long as the number of users is not too large. However there are several solutions when things start to get slow:
- When pipeline jobs take too much time to run, maybe adding more runners or using ECS instances with higher specs can help;
- When GitLab itself become slow, the simplest solution is to migrate it to a stronger ECS instance type.
When a single GitLab instance become unacceptable, maybe because of performance issues or because high-availability is required, the architecture can evolve into a distributed system involving the following cloud resources:
- Additional ECS instances;
- A server load balancer to distribute the load across ECS instances;
- A NAS to let multiple ECS instances to share a common file storage system;
- An external database.
As you can see the complexity can quickly increase. Tools such as Packer (virtual machine image builder), Terraform (infrastructure as code software) or Chef / Puppet / Ansible / SaltStack (configuration management) can greatly help managing it: they require an initial investment but allow organizations to better manage their systems.
Another solution is to let other companies to manage this complexity for you. There are many SaaS vendors such as GitLab.com or GitHub. Alibaba Cloud offers Codepipeline, but it is currently only available in Chinese.